Sailing around the world on 100% renewable energy. It really rolls off the tongue nicely, doesn't it. Well, our message here at Sailing Cinderella is not only that it's possible, but anyone can do it.
But how?
By harnessing that giant thermal-nuclear reactor in the sky! With solar panels.
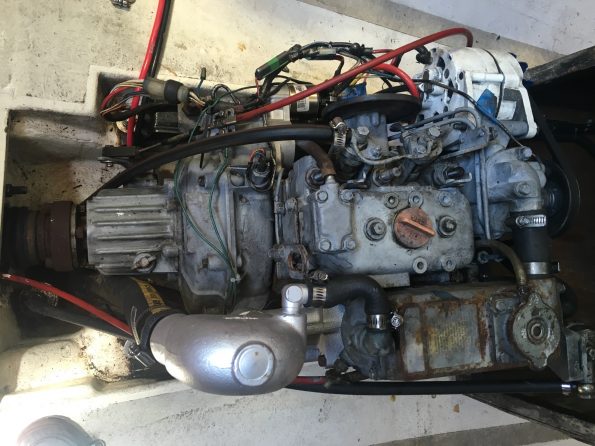
Aboard Cinderella we have a little more complicated electrical system than the typical sailboat with our electric drive system. But in the end, it isn't very complicated either. Below is a schematic of our solar charging system onboard . We will continue to improve the system and report back on our findings.

If you read one of our earlier posts Planning Your Solar Install you will learn why we chose the components that we chose. We are going to dig a little deeper now.
Before that, I would like to say upfront that...
I AM NOT A REGISTERED ELECTRICIAN.
I understand the principles of electricity and I have researched the standards that exist for sailboats. I recommend all readers do the same before attempting an installation of a solar array.
Before I got into the wiring bit, there were a few questions I had to ask myself
What size wires are required?
Thanks to Ohm's law we know V=IR. Basically, the lower the voltage the higher the amperage, and the bigger the wire diameters that are required. Bigger wires cost more money, and it will be harder to feed them through the tight crevasses of a boat. Fortunately there are charts to help us here. I always use the chart to find the wire gauge needed.
How much input voltage can the charge controllers handle?
This is the maximum voltage coming from the solar panels. For basic PWM controllers this is lower than their MPPT counterparts. All charge controller will have this stated in their manual. The MidNite Solar Kid we used on Cinderella can handle up to 150V coming in from our solar panels. We can even programm it for 12, 24, or 48V battery banks.
Will the panels see equal shading?
If the panels see equal shading, it may make sense to wire them in series. If the shading is very different, parallel may be the better option.
On Cinderella, both of our Solar World panels on our bimini are the same. This allows us to wire them in series or parallel. We decided to wire them in series giving us a high enough voltage to charge our motor battery bank.
The smaller solar panel that we installed on our dodger is wired to its own PWM controller. Since it is wired to its own controller, we do not need to worry about how it will affect the other panels.
Is there space near the battery bank for a controller?
The wire run from the controller to the batteries can carry a very high amperage. Since amps = heat, these wires will need to be a large enough to handle the heat created by the resistance of the wire.
The longer the wire run is, the bigger the wires need to be. Big wires don't bend easy, and they take up lots of space. The closer you can keep you controllers to a clean dry battery compartment the shorter the wire run, and the smaller they need to be.
Note: charge controller can get pretty hot when they are operating near maximum capacity. Make sure the installation area has some sort of ventilation.
Our Plan
[caption id="attachment_1129" align="aligncenter" width="595"]
Cinderella's onboard solar charging schematic[/caption]
The goal was to wire our two SolarWorld 345w panels in series and install them over our cockpit. The power from the panels will run through a switch where we can select to charge either our 12V or 48V battery bank.
Each bank will have its own dedicated MPPT charge controller to handle the 80V coming in from the panels.
Our solar panels are capable of producing more power than our MidNite Kid can handle when charging our 12V system. This means we will max out the controller when the sun is shining high in the sky. This also means that we will miss out on some available power. Hopefully we won't need it.
When we are charging our 48V system, the Midnite Kid can easily handle all of the power that our panels can produce. This is because the V=IR. As voltage is increased, the amps (heat) are decreased.
Since the Midnite Kid could be configure to charge at 12V and 48V, we decided to purchase two of the same controller. Using one for each system would give us redundancy in the event of a failure.
Since Cinderella came with a Morningstar 10 amp PWM charge controller, we decided also to get a smaller flexible panel to put on our dodger. I figured it couldn't hurt to supplement our 12V bank and the panel was relatively inexpensive at the time.
Mounting
The ideal mounting system for solar panels is definitely a dedicated robust arch. Track down your local marine welder and I am sure they could come up with something that not only functions, but is aesthetically pleasing.
If you are on a budget, craftier options are required. Many sailboats already have a folding bimini frame of some sort. A few supports in key areas really opens up the square footage for a solar install at a minimal cost.
Bimini Mount
Cinderella was a sleek racer, she came with no bimini. I knew the cost of a quality tubing bender's time was outside of my budget, so I kept my eye open for ideas. I ended up finding a used bimini frame on Craigslist and figured I could add some structural support bits from onlinemetals.com and Bosun Supply. The resulting arch cost me about $500.

Dodger Mount
We added the flexible panel I bought from Amazon to our dodger using canvas turn fittings. We got crafty with a soldering iron/hot knife to make clean holes in the Sunbrella fabric. The knife also worked perfectly when widening the holes on the solar panel's plastic backing.

Wiring
SolarWorld Panels
In order to charge a battery, you must apply a voltage higher than that of a battery. Simple enough, right? Most "12V" solar panels actually produce 18V.
Cinderella has both a 12V battery bank and a 48V battery bank. Therefore we must produce more than 48V to charge both battery banks. Our large Solar World panels produce a maximum voltage of 47.8V. This is not enough to charge a 48V battery, so I knew we would have to wire them in series.

I installed breakers on the positive feed to provide safety to the system. I also installed a selector switch allowing me to select which battery bank I wanted to charge with these panels, either the 12V house bank, or the 48V motor bank.
**This constitutes high voltage DC and you should take proper precautions**
HQST Panel
This panel I added on the dodger as a separate charging source since we had a PWM charge controller and the panel was relatively cheap. My hopes were that this panel could offset the house loads while we were charging our motor bank.
Unfortunately, the Morningstar PWM charge controller fizzled out after it was splashed by saltwater. A wave pooped us on our first night in the ocean off the WA coast dumping several hundred gallons of seawater in into our cockpit and about a buckets worth down our companionway. By the time we replaced the charger with a matching cheap amazon.com charge controller, the panel had worn out.
I would not recommend cheap flexible panels, or the cheap charge controllers found on Amazon. While these may be fine for hobbyists, on ocean going vessels I have found it's best to spend a little more money on quality equipment.
Batteries
48V Motor Bank

Making our 48V battery bank for Cinderella was pretty straightforward. Take four standard 12V batteries and wire them in series. The result is a 48V battery bank.
When I first installed the system, I used the cheapest marine/starting batteries I could find at the local auto parts store. All in all, the cost was about $300 and I was able use the boat to race and daysail locally for two seasons. It was a cheap, easy solution, but I killed them in two seasons.
Before we left Seattle to go cruising, we replaced those batteries with four 115 Ah DYNO deep cycle batteries. This suited our budget and almost doubled our range. DYNO is a Seattle company, and we got the chance to tour the facility before picking up our batteries. At their facility, DYNO recycles old batteries and uses the lead to make new ones. How Cool! This is definitely a perk to the older lead acid technology, local recycle-ability.
I really hope that along with any new battery technology, there is equal thought into how to manufacture/recycle it sustainably.
12V House Bank

Cinderella was a very simple race boat when I bought her. She had two 90Ah AGM batteries wired in parallel to run her house systems. Not only were these two batteries ageing, but I knew they were not up to the task of handling cruising sailboat loads.
I started reading about these Oasis Firefly carbon foam batteries. Nigel Calder, author of many marine reference books, seemed to speak highly of them, that was a good sign.
Two big factors that convinced me to use Firefly for our house systems were their ability to handle deep discharges without drastically shortening their life, and how well they handled extended periods of time at a partial state of charge. Other pros are that they are maintenance free and seemed robust enough for offshore cruising.
Our charging system was going to be 100% renewable and I wanted to be sure we could handle cloudy days with little sunshine. We ended up purchasing two 116Ah Firefly Energy G31 batteries. They could live in the same footprint of the two AGM batteries we already had, and should give us more useable power.
Future Improvements
As battery technology advances, I expect the cost to drop. I would love to upgrade our motor battery bank to a Firefly or LiFePO4 batteries. Will be cruising, and will not have access to plugging in at the end of the day. A battery that can handle extended periods at a partial state of charge could be very beneficial.
I would also love to link both the 12V and 48V systems together. Currently, we can only charge one battery bank at a time using our selector switch. Ideally we will connect both banks together with some sort of DC-DC charger, allowing the panels to charge everything at the same time.

Donate
I hope this post helps you figure out what you need for your system. As you can see, there are a few factors to consider, but the end result can be decades of energy freedom.
If you like the open source information we continue to share, please consider a donation. Every little bit helps keep the Sailing Cinderella dream afloat!